In this post we will cover what RubyMotion is & take you through how to use it by building a simple To-Do app. It’s a longish post, so to save you some trouble here’s a simple index:
- Introduction
- Installation
- Homework
- Tutorial setup
- Text area & table
- Add Tasks & Local Db
- Mark A Task As Completed
What is RubyMotion?
Simply put RubyMotion is a tool that allows you to write iOS apps in Ruby whilst bypassing Objective C altogether. RubyMotion compiles the Ruby code to machine code, which is same as Objective C, and thus the device can’t tell the difference between RubyMotion and the objective C iOS apps.
Why use RubyMotion?
If you know Ruby well and you want to start building iOS apps, there’s nothing better than RubyMotion. Sure you have to learn a new framework (Cocoa Touch), but that’s easier & quicker than rather than learning a new language (Swift, Objective C). The icing on the cake is that RubyMotion preserves the iOS SDK exactly as intended by Apple, so all existing code examples and tutorials are perfectly translatable.
Installation
“RubyMotion is created by Hipbyte. It’s a paid software with 30 days fully functional trial, which is enough time for you to try and see if it suits you.
It requires Xcode, which can be downloaded from the app store. Other dependencies are iOS simulator and command line tools.
Homework
If you’re completely new to RubyMotion, a very good place to start is by completing the following two tutorials to build a hello world app.
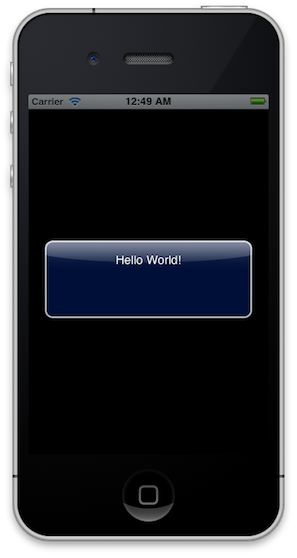
Once you go through these tutorials, your key takeaways should be:
rakecommand is used to run app on simulator- Everything that is visible on the screen is a
UIView - Views can have subviews, and that can keep on going.
- It uses the Model-View-Controller pattern.
To-do App Tutorial: Setup
Let’s begin with our tutorial:
motion create todo
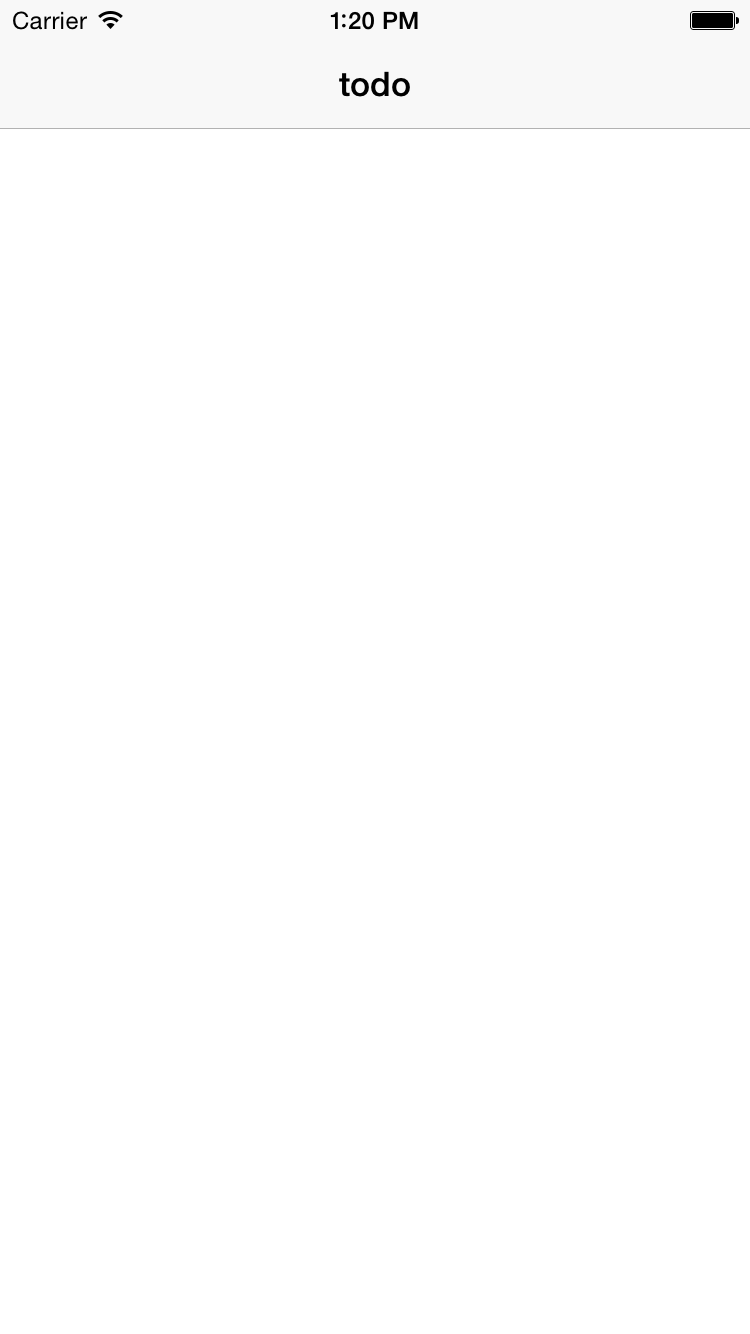
Create a List Controller , which is UIViewController, right now it sets background color as white.
  class ListController < UIViewController
    def viewDidLoad
      super
      self.view.backgroundColor = UIColor.blackColor
    end
  end
Change the change app_delegate to load our new controller as root view controller.
  class AppDelegate
    def application(application, didFinishLaunchingWithOptions:launchOptions)
      @window = UIWindow.alloc.initWithFrame(UIScreen.mainScreen.bounds)
      @window.makeKeyAndVisible
      @window.rootViewController = ListController.new
      @window.rootViewController.wantsFullScreenLayout = true

      $root_controller = @window.rootViewController
      true
    end
  end
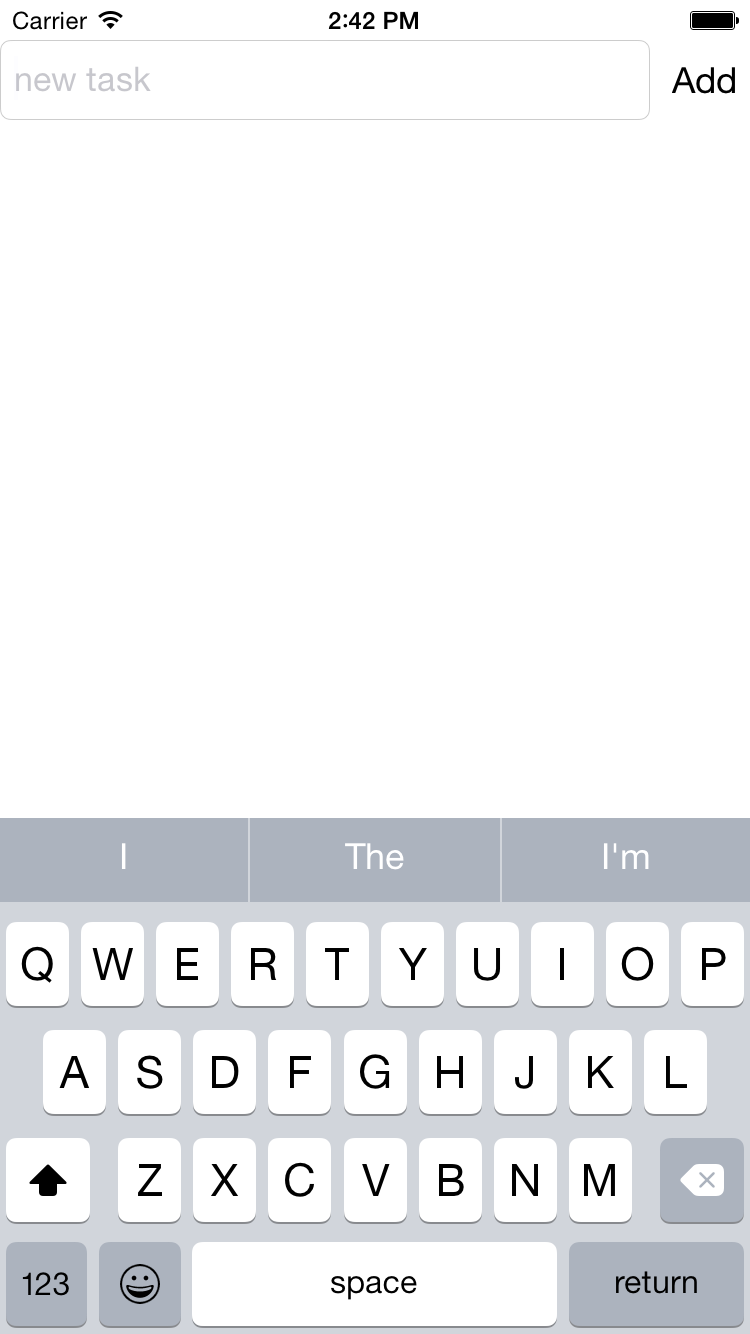
Add Text Area
Now we added a UITextArea and a UIButton. We call add_task function on button click. Which just prints a log right now.
The rest of the code is pretty self-explanatory for Ruby users.
Now the listcontroller looks like
  class ListController < UIViewController
    def viewDidLoad
      super
      self.view.backgroundColor = UIColor.whiteColor
      add_text_area
    end

    def add_text_area
      text_field_view = UITextField.alloc.initWithFrame(CGRectMake(0, 20, self.view.frame.size.width - 50, 40))
      text_field_view.delegate = self
      text_field_view.borderStyle = UITextBorderStyleRoundedRect

      text_field_view.textColor =UIColor.blackColor
      text_field_view.becomeFirstResponder

      text_field_view.placeholder = "new task"
      text_field_view.textAlignment = NSTextAlignmentLeft
      self.view.addSubview(text_field_view)

      #add button
      add_task_button = UIButton.buttonWithType UIButtonTypeCustom
      add_task_button.setFrame(CGRectMake(self.view.frame.size.width - 40, 20, 35, 40))
      add_task_button.setTitleColor(UIColor.blackColor, forState: UIControlStateNormal)
      add_task_button.setTitle("Add", forState: UIControlStateNormal)
      add_task_button.addTarget(self,
                                   action: :add_task,
                                   forControlEvents: UIControlEventTouchUpInside)
      self.view.addSubview add_task_button
    end

    def add_task
      NSLog("Task Added")
    end

  end
Add Empty Table
Now we will add an Empty UITable for our app. This is a very good introduction to using tables in RubyMotion.
First we will initialize an empty table and add it to the main view as a subview.
  def add_task_list
    table_view = UITableView.alloc.initWithFrame(CGRectMake(0, 70, self.view.frame.size.width, 200))
    table_view.dataSource = self
    table_view.delegate = self
    table_view.clipsToBounds = false
    self.view.addSubview table_view
  end
This function sets the values for each row in the table, which right now would be nil.
  def tableView(tableView, cellForRowAtIndexPath: indexPath)
    @reuseIdentifier ||= "cell"
    cell = tableView.dequeueReusableCellWithIdentifier(@reuseIdentifier)
    cell ||= UITableViewCell.alloc.initWithStyle(UITableViewCellStyleDefault, reuseIdentifier: @reuseIdentifier)


    cell
  end
This function returns total number of rows in the table. We have hard-coded it to 10 for demo.
  def tableView(tableView, numberOfRowsInSection: section)
    10
  end
And the viewDidLoad now looks like this.
  def viewDidLoad
    super
    self.view.backgroundColor = UIColor.whiteColor
    add_text_area
    add_task_list
  end

Following The MVC
Now we will create a list_view in app/views/ , which is a UIView and move all the code there.
We override the initWithFrame function for the ListView, which is a setter for this class.
  def initWithFrame frame
    super
    add_text_area
    add_task_list
  end
And we initialize this view from our ListController.
  def viewDidLoad
    super
    self.view.backgroundColor = UIColor.whiteColor
    list_view = ListView.alloc.initWithFrame(self.view.frame)
    self.view.addSubview(list_view)
  end
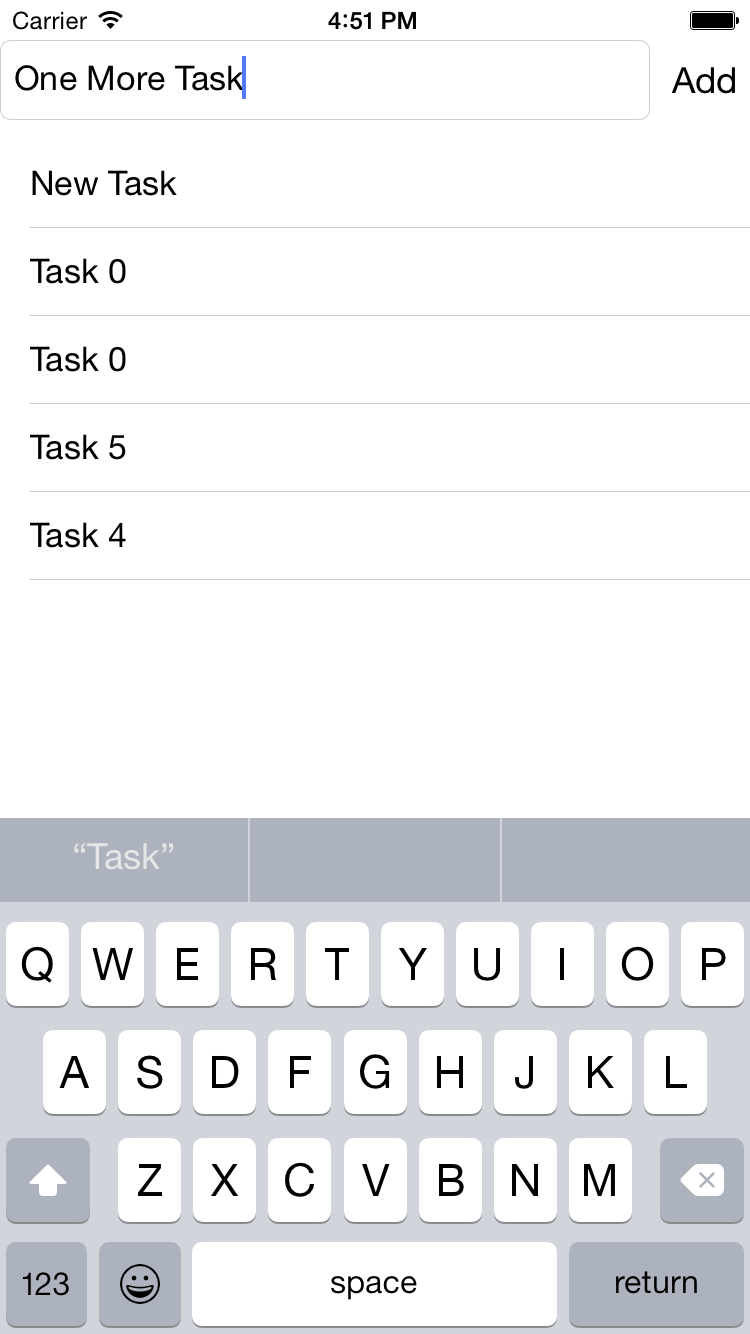
Adding a task
Now we will implement the function of when a task is created it gets added to the list.
using attr_accessor
Now we need to alter these views from different functions, so we will use the attr_accessor so that we can set and use attributes :)
attr_accessor :text_area, :task_list, :add_task_button
self.text_area = text_field_view
Now we store the tasks in attribute which is an array and add the current text of the text_area to that array when add_task button is clicked. Then we reload the table data.
  def add_task
    NSLog("Task Added")
    self.tasks << self.text_area.text
    self.task_list.reloadData
  end
Select appropriate value for the table row.
  def tableView(tableView, cellForRowAtIndexPath: indexPath)
    @reuseIdentifier ||= "cell"
    cell = tableView.dequeueReusableCellWithIdentifier(@reuseIdentifier)
    cell ||= UITableViewCell.alloc.initWithStyle(UITableViewCellStyleDefault, reuseIdentifier: @reuseIdentifier)


    cell.textLabel.text = "#{self.tasks[indexPath.row]}"

    cell
  end
Add Local Database
In its current stage the app will not store any data. That means when you restart the app, all the tasks will be gone. We will create local storage with NanoStore as DB. And Cocoapods to integrate the nanostore.
Add required gems to Gemfile
gem 'motion-cocoapods’
gem 'nano-store'
here is the RakeFile
  # -*- coding: utf-8 -*-
  $:.unshift("/Library/RubyMotion/lib")
  require 'motion/project/template/iOS'
  require 'motion-cocoapods'
  require 'nano-store'


  begin
    require 'bundler'
    Bundler.require
  rescue LoadError
  end

  Motion::Project::App.setup do |app|
    # Use `rake config' to see complete project settings.
    app.name = 'todo'

    app.pods do
      pod 'NanoStore'
    end
  end
Install the gems and pods.
bundle install
bundle exec rake pod:install
And to the app_delegate add following line to set db file path.We will use a local file as DB.
  documents_path         = NSSearchPathForDirectoriesInDomains(NSDocumentDirectory, NSUserDomainMask, true)[0]
  NanoStore.shared_store = NanoStore.store(:file, documents_path + "/nano.db")
Bringing Models in Action
Now we will create a model for tasks and store it locally.
  class Task  < NanoStore::Model
    attribute :name
    attribute :created_at
  end
Loading all tasks in memory when ListView loaded.
  def initWithFrame frame
    super
    self.tasks = Task.all.sort {|a,b| b.created_at <=> a.created_at}
    add_text_area
    add_task_list
  end
Create new task in the DB with add task function.
  def add_task
    NSLog("Task Added")
    task = Task.create(:name =>  self.text_area.text, :created_at => Time.now)
    self.tasks.unshift(task)

    self.task_list.reloadData
    self.text_area.text = ""
  end
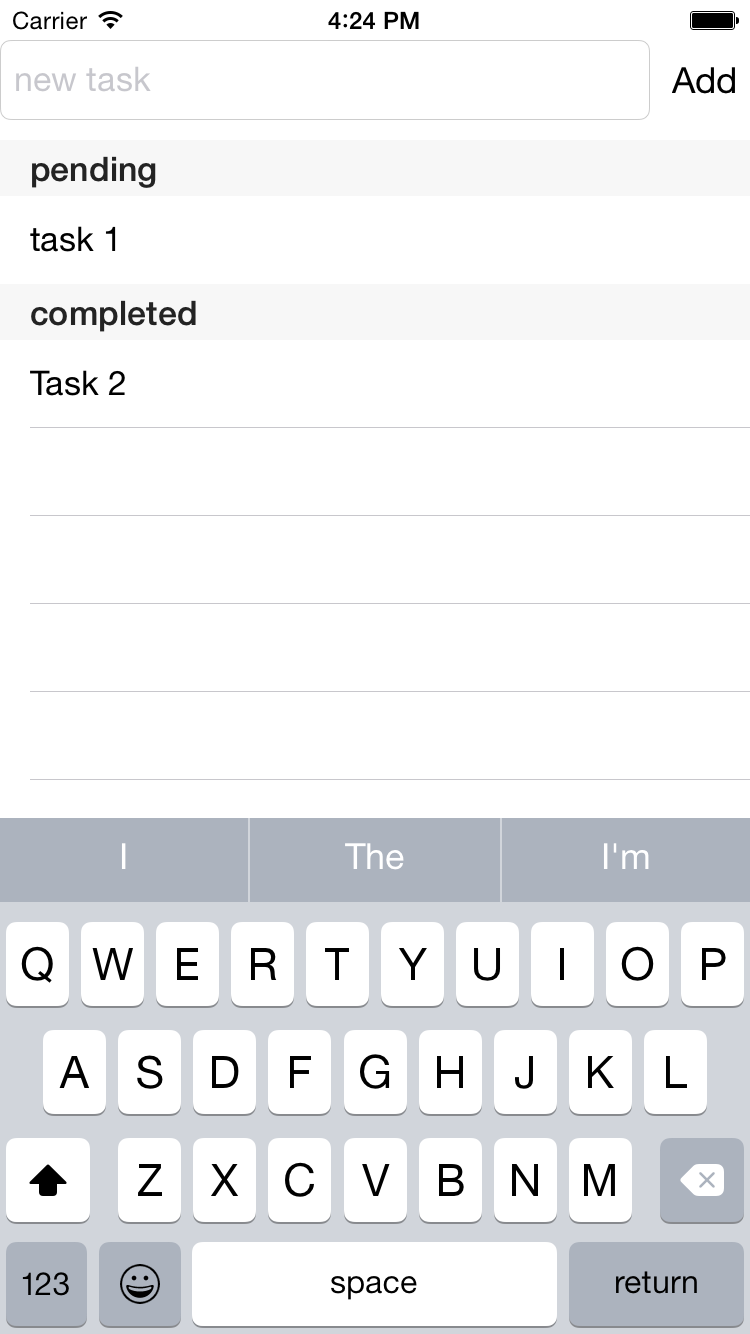
Different Sections for Completed & Pending Tasks
Now we will separate the table in 2 sections, completed and pending tasks. After all that is the point of a To-do app. We will set it so that clicking on a task will move it from one section to another.
We have 2 attributes :completed_tasks, :uncompleted_tasks
And we initialize these 2 attrbutes with required data.
  self.completed_tasks = Task.find(:completed, NSFEqualTo, 1).sort { |a, b| b.created_at <=> a.created_at }
  self.uncompleted_tasks = Task.find(:completed, NSFEqualTo, 0).sort { |a, b| b.created_at <=> a.created_at }
We add these 2 sections in our table “pending” and “completed”.
  def numberOfSectionsInTableView(tableView)
    2
  end
  def tableView(tableView, titleForHeaderInSection: section)
    if section == 1
      "completed"
    elsif section == 0
      "pending"
    end
  end
  def tableView(tableView, cellForRowAtIndexPath: indexPath)

    @reuseIdentifier ||= "cell"
    cell = tableView.dequeueReusableCellWithIdentifier(@reuseIdentifier)
    cell ||= UITableViewCell.alloc.initWithStyle(UITableViewCellStyleDefault, reuseIdentifier: @reuseIdentifier)

    if indexPath.section == 0
      cell.textLabel.text = "#{self.uncompleted_tasks[indexPath.row].name}"
    elsif indexPath.section == 1
      cell.textLabel.text = "#{self.completed_tasks[indexPath.row].name}"
    end
    cell
  end
  def tableView(tableView, numberOfRowsInSection: section)
    if section == 0
      Task.find(:completed, NSFEqualTo, 0).count
      self.uncompleted_tasks.count
    elsif section == 1
      Task.find(:completed, NSFEqualTo, 1).count
    else
      0
    end
  end
This Function handles the event when any row is clicked.
  def tableView(tableView, didSelectRowAtIndexPath: indexPath)
    tableView.deselectRowAtIndexPath(indexPath, animated: true)
    cell = tableView.cellForRowAtIndexPath(indexPath)
    self.mark_as_done(cell)
  end
And the mark_as_done function toggles the task between completed and pending.
  def mark_as_done cell
    task = Task.find(:name, NSFEqualTo, cell.textLabel.text).first
    task.completed = !task.completed
    task.save
    self.reload_table_sections
  end
Here is the Link to the source code.
The End